
Fashion design, pattern making & sewing courses
The fashion program
UA creative and artistic program
An approach following the history of fashion and its designers:
Learn the fashion trends and social phenomena
Learn the techniques of artistic expressions of fashion design
Discover and use the different materials and their derivatives
Become a fashion stylist: to create unique models
Fashion design:
from the idea to the realization of a 3D drawing
Fashion silhouette
It is the drawing of a human body with larger proportions for men and women. The body measure equals between 9 and 10 times that of the head.
For children and babies fashion design, proportions do not change.
Depending on the complexity of some models, it is possible to draw a front view and a back view model.
The position of the silhouette should provide the maximum information on your future creation.
Fashion trends
« Don’t be into trends. Don’t make fashion own you, but you decide what you are, what you want to express by the way you dress and the way you live. » Gianni Versace
Find new ideas
Get inspired by all cultural currents
Detect market movements
Display consumer behaviors
Decode the looks
Discern the seasons preferences
Follow the evolution of street-style
Once the trends are clear, the colors and materials are defined, as well as the style and the concept. « Fashions fade, style is eternal. » Yves Saint Laurent
Fashion sketch
Draw models, create sketches, combine lines, shapes and colors to give rise to your collection and its realization.
Master clothing design techniques and, while preparing your fashion sketches, take into account the clothing basic techniques:
How do I get into this model?
How do I get out of it?
For some models, a flat technical drawing will be added to your plate.
In order to facilitate its pattern making and its realization, the model is drawn in front and back view in a technical way to show the pattern maker the involved elements, the stitch positions, the detail of the finishes so that its production complies with the fashion sketch.
Once the fashion sketches are completed, it is possible to move on to the next step.
Balance of the plate: the development of your own collection
Your fashion plate consists of:
- a colored fashion sketch in front, three quarter or back view
- black-and-white technical drawings, flat front or back view
- a title
- a text to explain the drawing technique(s)
You can add textile materials, buttons…
Coloring
Coloring is your choice: felt pens, colored pencils, watercolors… avoid black and white, unless your collection is a black and white one.
The skin and face of your silhouette provide a character to your fashion silhouette.
Volume
The volume is created by the drawing, but also by the shadows made on it.
The silhouette must come out from the sheet of paper.
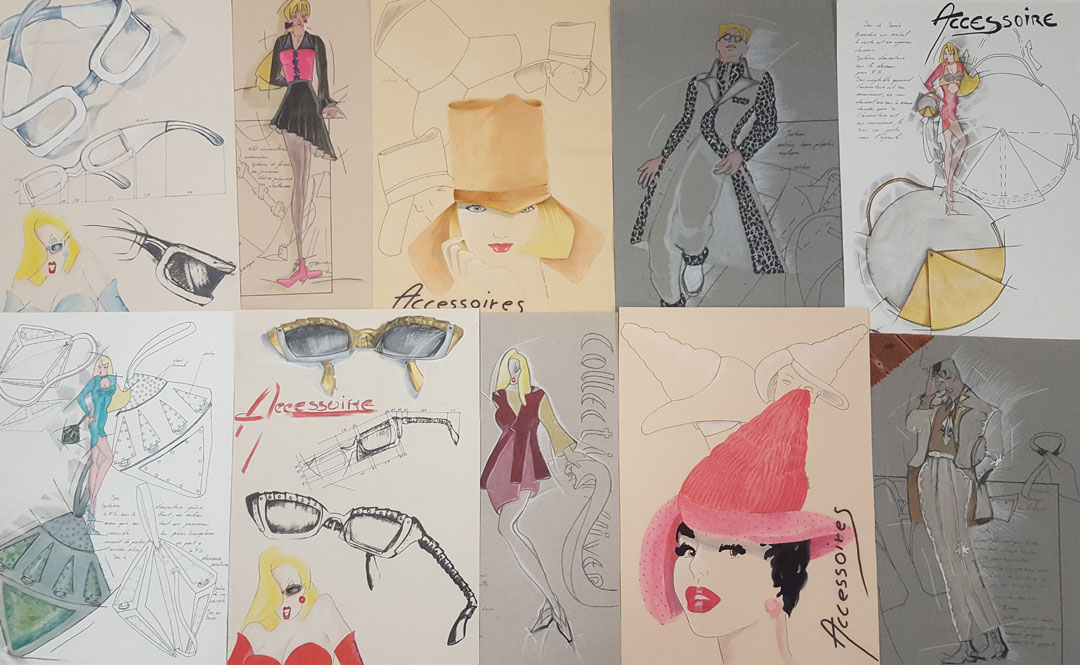
Fashion accessories design:
shoes, belts, lingerie, bags…
Sketch design
The accessory design drawing is a zoom drawing with the best view to allow the realization of the model.
Fashion trends
Find new ideas
Adapt your creations to cultural trends
Detect market movements
Understand consumer behavior
Follow the seasons preferences
Once fashion trends are clear, after having established the trends, colors and materials, they will allow you to define your style and concept.
Volume perspective
The sketch design and sketch techniques are perspective views, top view, side view, view from the inside if needed.
Basic measure drawing
For objects being designed, measures are needed too.
The measures correspond to the millimeter dimensions of the object (height, width, depth, thickness …)
Balance of the plate: The development of your own collection
Your design plate consists of:
- a fashion sketch in front, three-quarter or back view according to the chosen effect to be put in color
- flat technical drawings in front or back view (in black and white)
- a title
- a text to explain the drawing technique(s)
- textile materials
Highlighting
Use color and shadows to let the conceived item stand out from the sheet of paper.
« Graphic design will save the world right after rock and roll does. » David Carson
Pattern making:
bring the sketch to life…
The model maker transforms the idea of the stylist, from the plate to the realization.
Pattern making is the art of drawing all the necessary pieces and information (notch, stitches, middle, straight line, stitching values, tucks…) for the realization of a model.
Stitching values
Depending on the assembly, the stitches can be only 0.5 mm (overcast). The dimensioned stitches can range between 1.5 and 2 cm depending on the fabric and quality grade. The stitches supporting a top-stitching depend on its width. Do not use an angled corner: look for the overlapping edges.
Metrics to respect:
0.5 mm to 0.7 mm collar, neckline, curve line
1 cm = shoulder, armhole, side, sleeve
1 cm to 1.5 cm (maximum depending on fabric) = rounded cutouts
1.5 cm to 2 cm stitching supporting a zipper or finished hem
2 cm to 3 cm = sleeve bottom hems
3 cm = rolled trousers bottom hems
3 cm to 5 cm = hems with invisible stitches
Reinforcement lining values
Depending on the quality of the garment and the fabric, the reinforcement lining can be 5 to 10 cm.
– Buttonholes: drawn but stitched only at the start
– Items staying under (collars, revers…) must be smaller than the one staying above
– Notches: only in the joints (ex: waist, hip belt positioning according to assembly)
– Tucks: 1 cm from the end. 2 notches at the start
– Pockets with holders: stitches maximum at 1.0 cm and minimum at 0.2 cm
– All the seamless pieces in the middle are made by a full piece.
Mark all the elements of the pattern
The different elements of the pattern must be marked and identified:
- SL and if necessary S.l. (straight line): direction of the fabric
- Size
- Number of times to cut
- Reference and order number of the summary: written on the back, bottom near the middle
The numbering of the elements is done ordering according to the surface (from the largest to the smallest) for example: Back = 1/6, Front = 2/6, Sleeve = 3/6, Reinforcement lining = 4/6, Pocket = 5/6, Cuff = 6/6
Flat cut and assembly: attention to detail
Once the fabric chosen, the fabric needs to be ironed with a mild temperature. Then, the direction of any patterns and stripes on the fabric is to be checked so as not to cut the wrong way. For velvet or other fabrics with pile (except fur), always cut in the reverse direction of the hair. Then, always put the fabric on the reverse side by matching the edges.
Finally, place the pattern on the fabric, pinning each part of the pattern to the fabric, to prevent the fabric from moving during the cut.
Cut the pieces in an accurate manner.
Using a pair of scissors, cut all the pieces of the model and remove the pattern only to perform the stitching. Mark the notches, middle lines, lengths, tuck values before removing the pattern. The notches must not exceed 5 mm.
Assembly of the model 0 or (prototype): with meticulousness
The prototype: it is the model 0 of the product. It is the reference model of the collection. It is used for the manufacture of the series production.
During the manufacturing process some changes may be made. Now that you have all the pieces of your pattern. You can pin different parts of the model together.
Once assembled, sew the model using a sewing machine and applying the industrial assembling techniques or by hand using needle and thread.
It is important to know different kinds of stitches to be performed manually.
Sewing stitches
All stitches have a distinct use. They form 5 families.
The assembly stitches:
They are used for the realization, by assembling 2 pieces of fabric of the pattern:
Basting stich: temporary stitching alternating 1 large stitch and 1 small stitch regularly
Forward stitch: useful for making gathers. Regular stitch from right to left
Backstitch: this stitch is used for assembling the model, especially for lightweight fabrics
Regular stitch: slightly spaced from right to left
Top stitch: This stitch is also used to assemble the model for thicker materials. This stitch is a combination of the forward and backward stitches
The invisible stitches:
They are used for hemming, lining finishing …
Catch stitch: used to assemble a zipper in an invisible way or perform a hem. This stitch allows creating a stitching without marks.
The overcasting stitches:
They are used to finish the edge of the piece of fabric.
Overcast stitch: it is used to hold 2 pieces of fabric edge to edge, very useful for slippery materials (lycra, poly, elastane…)
The topstitching stiches:
They are used to highlight a collar, pockets, a cut, an insert…
Saddle stitch: decorative stitch made using the forward stitch, with a thread or a coordinated yarn of the same color or of different colors.
Special stitches:
They are used to finish the model, a buttonhole,
Buttonhole stitch: Stitch the needle into the fabric, pass the thread through the needle to form a small loop and then gently pull the thread so that the knot is properly positioned on the edge of the fabric.
Textile design:
artistic production …
The textile design is a model of your print (textile for clothing, linens, interior decoration…). Several steps are required before obtaining the final design. The printing can be done on paper, on fabrics, using screen printing, discharge ink printing and other methods.
What model support to use for a fashion plate?
The model can be made on different media: Canson, Kraft paper, wallpaper, rice paper…
How many colors can be used?
Colors have a very important role in creating a fashion plate. They must not be trendy nor follow trends, they must precede trends. To illustrate the plate, it is possible to select a harmony in 4 ranges of colors. This involves reproducing exactly the same part of the model 4 times (10 cm x 8 cm approximately) or to decline different harmonious colors on each plate. The colors can be applied to the plate using painting, watercolor or ink techniques.
How to define a set?
A set can be used in household linen, clothes, interior decoration – e.g.: the model = the tablecloth and the set = the napkins. The fabrics feature different aspects but they are matched.
The set is a new motif that is associated to the model. The drawing should have a size of about 20 cm x 10 cm. The latter has to be created at your convenience, keeping in mind that it must enrich the model.
How to repeat a textile motif (arrangement)?
This is the arrangement of the printed motifs according to the all over, half jumper, head jumper method… The repetition of the motif is carried out by a printing by cylinder technique. There are different techniques to create the textile motif according to the goal to be achieved. Sub-multiples of the arrangement will have to be calculated to print the textile.
All over
To create an all-over print. First of all an illustration motif is created, be it floral, geometric… Once the motif is finished, it is repeated by turning it on the model aesthetically and regularly.
Caution: avoid putting the motif twice in the same direction and avoid creating lines.
Half jumper
First of all an illustration motif is created, be it floral, geometric… Once the motif is created, it is necessary to establish its position and to look how to reproduce such drawing halfway up the first in the same direction. This operation has to be done in the height and side direction.
It is necessary to arrange the edges in the same way. Often such type of printing is found with such arrangement for tapestries and wallpapers. Be careful not to repeat the motif in diagonal direction.
Head jumper
First of all an illustration motif is drawn, be it floral, geometric, animal… The created motif is then positioned and reproduced parallel to the first one in the horizontal and in the vertical direction. It is possible to add a border to complete the model.
Caution! The motif should not be repeated inversely in the vertical direction. It must be repeated in the same direction horizontally. This is the most difficult arrangement to be created.
Direct
First of all an illustration motif is drawn, be it floral, geometric, animal… The created motif is then positioned and reproduced parallel to the first one in the horizontal and in the vertical direction. It is possible to add a border to complete the model.
Positioned motif
For T-shirts, duvet covers, scarfs, with a positioned motif, there is no arrangement. But rather just a central motif, created with care.
Which are the textile printing techniques?
Cylinder printing
Cylinder printing is used for long fabrics with restocking. Maximum 8 cylinders are used and each cylinder corresponds to a color of the model. The cylinders are engraved according to their color. And colors are not separated. The circumference of a cylinder is 641.6.
For that you must choose the sub-multiple for its report in adequacy with its motif.
320,80 = 1/2
213,87 = 1/3
160,40 = 1/4
128,32 = 1/5
106,98 = 1/6
91,65 = 1/7
80,20 = 1/8
71,27 = 1/9
64,16 = 1/10
53,47 = 1/12
49,36 = 1/13
45,83 = 1/14
42,78 = 1/15
40,10 = 1/16
37,74 = 1/17
35,65 = 1/18
33,77 = 1/19
32,08 = 1/20
29,16 = 1/22
27,90 = 1/23
26,73 = 1/24
25,66 = 1/25
24,68 = 1/26
23,76 = 1/27
22,91 = 1/28
22,12 = 1/29
21,39 = 1/30
Digital printing
Digital printing on textiles is a widespread technique, which is accessible to all. Such technique can be used for small or large series. Digital printing on textiles is particularly suitable for motifs with many colors or gradients on clear textiles on 100% cotton. Colors are not separated.
Stamp or stencil printing
Textile printing by stamp or stencil are craft techniques that allow obtaining unique printing models.
Silkscreen printing
Silkscreen textile printing is widely used for printing and customizing clothing. The colors of the selected composition are printed either one by one or broken down into 4 primary colors from mesh screens which let the ink of a color pass in the defined places. Each frame corresponds to a color, so each frame is a part of the motif. Textile screen printing can be used for small and large quantities.
Discharge ink printing
Textile printing using discharge ink is generally used for printing small motifs on large background. This printing technique allows applying a colored ink that will remove the dyeing of the natural or synthetic fabric on which it is applied. It is a process of discoloration and re-coloring.
Textiles:
guide to the materials
When designing a product, the textile designer has to take into account the conditions of use; as a matter of fact it is up to the designer to select and know which textile material he/she will use.
A classification of the textiles can be established according to their origins:
Textiles of natural origin: animal, vegetable, mineral
Animal:
Wool: sheep, rabbit, camel, llama, goat, dog and cat
Silk: silkworm
Plant origin:
Down textiles: cotton, kapok
Stem textiles: linen, jute, hemp, ramie, broom, sisal
Leaf textiles: Raffia
Mineral origin:
Peat
Metal
Textiles of chemical origin
Artificial textiles:
They are made from natural products, especially cellulose, after several transformations. The material obtained is always cellulose or modified cellulose capable of being spun.
Viscose legal name = viscose or radius for continuous fibers.
Polynosic fabrics: Meryl, Zatrel
Acetate: Rhodia
Triacetate: Rhonl
From animal or vegetable proteins: Mérinova, caséni
From harachil: Ardil
Synthetic textiles:
Synthetic textiles are made from chemical products. Sudden transformations by these chemicals give rise to substances having no resemblance at all to the starting materials.
Polyamides or Nylon:
Polyamide is the synthetic fiber that has revolutionized fashion. Polyamide features an excellent resistance to tearing and rubbing; it is extensible, thin, and transparent, besides being soft and lighter than silk. It also features a good protection against rain and wind.
Polyamide 6-6 -Nylfrance, multilobed Obtel
Polyamide 6: Celon, polyfibre
Polyamide 11: Rilsan
Polyester or Tergal (legal name)
Polyester is a soft fabric and can convey a blowing effect. It is an excellent thermal insulator and lets humidity pass through without holding it. It is a fabric that dries very quickly.
Polyurethane or elastomer (legal name)
Chlorofibres: Rhovyl, chlorene
Acrylic: crylor, courtel
Polypropylene: Cetryl
How to recognize a textile fabric?
It is very difficult to recognize a textile. The appearance can often be misleading because of the very diverse finishes applied to textiles. The length of the fibers or the microscopic study of the tissues do not make it possible to define the tissue type.
Combustion is the best way to recognize the origin and characteristics of a fabric. Here are the observed results related to the burning of a fabric from a thread or a small piece of fabric.
Textile of animal origin:
| Wool | Wool burns slowly while sizzling, giving off the smell of burnt hair. The combustion is slow and difficult. |
| Silk | The silk is consumed without flame, it emits a smell of burning horn. |
Textile of plant origin:
| Cotton | Cotton burns without creating smoke or odor. |
| Linen | Linen burning is fast and natural. It releases a smell of burning paper. The ashes are clear and friable. |
Textile of mineral origin:
Combustion is zero and odorless. The ashes turn to glowing red and then return to their original appearance.
Artificial textiles:
| Viscose | The combustion of viscose is similar to that of vegetable textiles. |
| Acétate | The combustion of acetate or acetate fibers is rapid, accompanied by melting. An acid smell is perceived. The mass of ash is carbonized and irregular. |
Synthetic textiles:
| Polyamide 6/6 et polyamide 6 | This material melts forming a brown ball that acquires the shape of a drop. The smell is that of celery. |
| Polyamide 11 | The fabric melts without odor forming a brown ball that acquires the shape of a drop. |
| Acrylique | The burning of acrylic textiles is easy, the residue is black and brittle. They smell of almond. |
| Polyester | Polyester does not melt and burn only in the flame. It does not run. |
| Chlorofibre | Chlorofibre does not burn, it flees the flame and retracts. It is easy to identify chlorofibres by blushing the end of a copper wire in the flame, inserting it in the material and then putting it back on the flame. If it turns green, the sample contains chlorofibres. |
| Ver textile | Ver textile does not burn, it does not emit any odor. It turns into a white ball. |
| Élastomère | Elastomer burns melting. The smell is aromatic. The ashes are black and puffy. |

